-
[13] Spring Web MVC : static resource 지원Spring/Spring boot 2020. 6. 22. 17:23반응형
[Static resource의 기본 경로와 사용법]
static resource는 request에 대해 response할 때 사용되는 이미 존재하는 resource를 말합니다.
- classpath:/static
- classpath:/public
- classpath:/resources/
- classpath:/META-INF/resources
위 네가지 path 있는 resource들은 "/**" request에 mapping 되어 제공됩니다. 예를 들어 "/hello.html"이라는 request가 들어왔을 때 /static/hello.html 이라는 resource가 존재하면 그것을 사용하여 response 해줍니다.
static resource request 시 어떻게 response 되는지 확인해보기 위해 test code를 다음과 같이 작성합니다.
@RunWith(SpringRunner.class)
@WebMvcTest(UserController.class)
public class UserControllerTest {

    @Autowired
    MockMvc mockMvc;

    @Test
    public void getStaticResource_테스트() throws Exception {
        mockMvc.perform(get("/hello.html")
                .contentType(MediaType.TEXT_HTML)	//	①
                .accept(MediaType.TEXT_HTML))		//	①
                .andExpect(status().isOk())		//	②
                .andExpect(content().string("<!DOCTYPE html>\n" + //	③
                        "<html>\n" +
                        "<head>\n" +
                        "    <meta charset=\"UTF-8\">\n" +
                        "    <title>Title</title>\n" +
                        "</head>\n" +
                        "<body>\n" +
                        "Hello static resource\n" +
                        "</body>\n" +
                        "</html>"));
    }
}
① test를 진행할 URI에 해당하는 resource가 html 형태의 static resource 이므로 response, request 시 사용할 MediaType을 text/html로 지정합니다.
② response가 정상적으로 일어나는지 확인합니다.
③ response될 hello.html file의 HTML code와 content().string() method의 매개 값이 동일해야 test를 통과합니다.
현재는 hello.html이라는 static resource가 static resource path 상에 존재하지 않으므로 test를 실행 시 404 error를 보게 됩니다. test를 통과하도록 만들기 위해 /src/main/resources/ 아래에 static이라는 이름으로 directory를 하나 생성하고 그 밑에 다음과 같은 내용으로 hello.html file을 추가합니다.
<!DOCTYPE html>
<html>
<head>
    <meta charset="UTF-8">
    <title>Title</title>
</head>
<body>
Hello static resource
</body>
</html>
test를 실행해보면 정상적으로 통과함을 확인할 수 있습니다.
실제로 response 된 내용을 browser에서 정상적으로 확인해보기 위해 application을 실행한 상태로 http://localhost:8080/hello.html
로 접속하면 다음과 같이 static resource에 해당하는 page가 보여짐을 확인할 수 있습니다.

static resource가 변경되었을 경우에 대해 알아보기 위해 hello.html의 내용을 다음과 같이 조금 수정해 봅니다. (test code도 수정해줍니다.)
<!DOCTYPE html>
<html>
<head>
    <meta charset="UTF-8">
    <title>Title</title>
</head>
<body>
Hello static resource. (updated)
</body>
</html>
http://localhost:8080/hello.html page를 새로고침 하면 status 200이 뜨면서 새로운 내용으로 새로고침 됩니다.
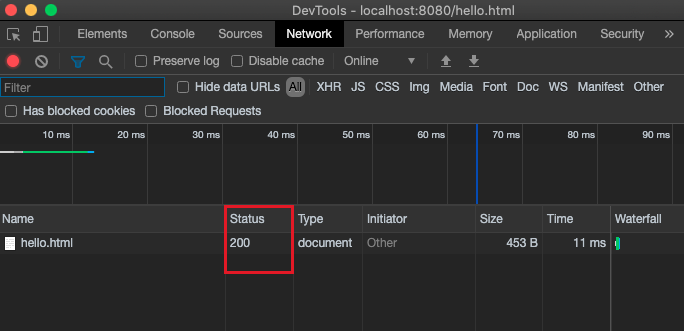

static resource mapping을 처리하는 handler는 ResourceHttpRequestHandler입니다. 이 handler는 Last-Modified header를 보고 static resource의 변경여부를 확인하여 변경이 없는 상태에서 다시 해당 resource에 대한 request가 발생하면 304 status가 뜨면서 현재 page로 redirection 합니다.

304 status 응답은 resource를 다시 받아오지 않으므로 속도가 보다 빠릅니다. 일종의 caching 기능이라고 볼 수 있습니다.
[Static resource path 변경]
Static resource path 변경을 위해 application.properties file에서 spring.mvc.static-path-pattern property를 다음과 같이 변경해 봅니다.
spring.mvc.static-path-pattern=/static/**이제 static resource path는 root부터가 아닌 /static/ 부터 시작됩니다. 따라서 http://localhost:8080/hello.html을 접속하면 404 status로 response 됩니다. 정상적으로 static resource를 response 하기 위해서는 http://localhost:8080/static/hello.html로 접근해야 합니다.
[Staitc resource path 추가]
사용자가 원하는 static resource path pattern을 추가하여 사용할 수 있습니다.
WebConfig class를 만들고 그 내용을 다음과 같이 작성합니다.
@Configuration
public class WebConfig implements WebMvcConfigurer {
    @Override
    public void addResourceHandlers(ResourceHandlerRegistry registry) {
        registry.addResourceHandler("/m/**")    //	①
                .addResourceLocations("classpath:/m/")  //	②
                .setCachePeriod(20);    //	③
    }
}
① 지정된 path pattern에 대한 handler를 추가합니다.
② 반드시 /로 끝나야 정상적으로 동작함에 주의합니다.
③ caching period를 20초로 지정합니다.
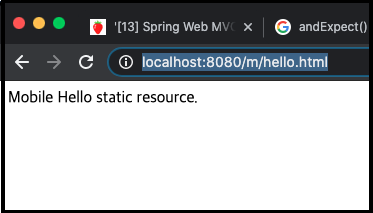
/resource/m/hello.html file을 생성하고 그 내용은 다음과 같이 입력해 봅니다.
<!DOCTYPE html>
<html>
<head>
    <meta charset="UTF-8">
    <title>Title</title>
</head>
<body>
Mobile Hello static resource.
</body>
</html>
http://localhost:8080/m/hello.html 로 request 하면 해당 path의 static resource가 response 됩니다.
'Spring > Spring boot' 카테고리의 다른 글
[15] Spring Web MVC : Index page and Favicon (0) 2020.06.24 [14] Spring Web MVC : Web JAR (0) 2020.06.23 [12] Spring Web MVC : ViewResolver (0) 2020.06.21 [11] Spring Web MVC: HttpMessageConverters (0) 2020.06.17 [10] Spring Web MVC: Introduction (0) 2020.06.15